
I was surprised to find out recently that making 3D Anaglyph images, ie – old style Stereoscopic, Red & Cyan as opposed to the modern Polarized type of effect used in the likes of Avatar, was really pretty straightforward and quick.
Here’s how:
- Get a proper camera, (not phone!) and take 2 images of any object from the same position using the viewfinder. One with each eye,
- Import both photos into Photoshop and copy and past the image taken with the right eye into the image taken with the left eye so that they both overlap exactly,
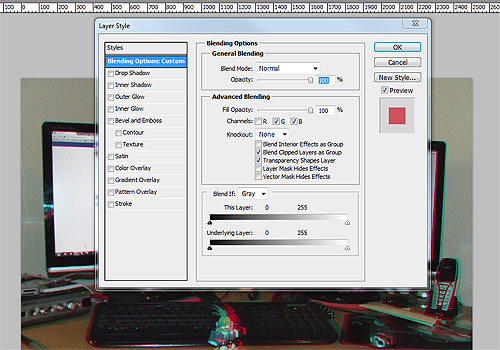
- Double click the Right eye layer to open up the Blending Options screen and turn off the Red Color channel under “Advanced Blending” as below:
- Select the Left eye layer and use the Move tool to align the image to whichever Focal point you prefer to make that point the focus of attention.
- DONE!
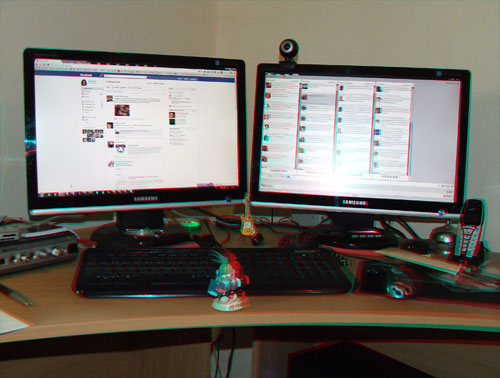
Get hold of some 3D glasses and view the result! Here’s my effort:

One thought on “Make a 3D Image in Photoshop”